Installing an electric gate is a significant enhancement to any property, providing not only improved security but also increased property value and convenience. At All Gates Repair Dallas, we specialize in seamless installations that merge security with aesthetic appeal. This guide will walk you through the process of electric gate installation, ensuring you understand every aspect from choosing the right type to the final setup.
Choosing the Right Electric Gate
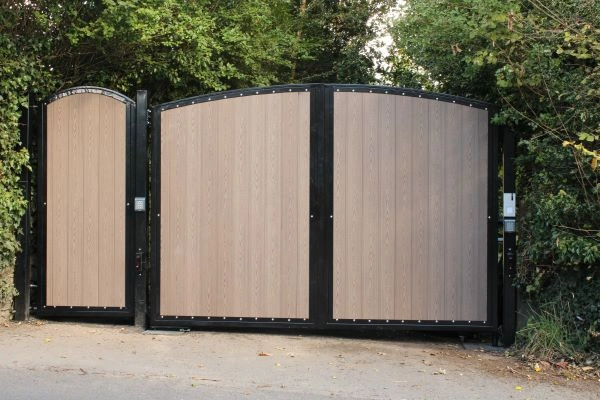
Before diving into the installation process, selecting the right gate for your needs is crucial. Consider the gate’s purpose, your property’s layout, and how you want the gate to enhance your property’s security and appearance. For those unsure about the options available, our experts at All Gates Repair Dallas can guide you through the selection process.
- Types of Gates: Whether it’s a swing gate or a sliding gate, each has its benefits depending on your driveway’s size and slope.
- Materials Used: Choose materials that complement your property’s exterior and offer durability against weather conditions.
- Access Control Systems: Integrate access control systems to enhance security, such as keypads, card readers, or biometric systems.
Preparation and Foundation Setting
Proper preparation of the installation site is essential for the longevity and functionality of your new electric gate.
- Site Assessment: Ensure that the area is clear of debris and check the soil condition to establish a stable foundation.
- Foundation Creation: Depending on the gate type, laying a concrete foundation might be necessary to support the gate’s weight effectively.
Installation Process
Follow these detailed steps to ensure your electric gate is installed correctly:
- Post Installation: Secure the posts that will support your gate. These should be embedded deeply into the ground or anchored into a concrete foundation.
- Gate Mounting: Attach the gate to the posts using sturdy hinges (for swing gates) or install the track and rollers (for sliding gates).
- Electrical Setup: This step should be handled by a professional to wire the electric components safely and correctly.
Installing the Gate Opener
The gate opener is crucial for the functionality of your electric gate. It should be chosen based on the gate’s size and weight.
- Choose the Right Opener: Our range of gate openers suits various types of gates.
- Installation: Mount the opener and connect it to the gate. Ensure all moving parts are aligned and lubricated.
Safety Measures and Testing
Once the gate and opener are installed, it’s vital to install safety measures and conduct thorough testing.
- Install Safety Sensors: Sensors prevent the gate from closing if an obstacle is detected, protecting vehicles and pedestrians.
- Test the Gate: Open and close the gate several times to ensure it operates smoothly without any issues.
Maintenance Tips
Maintaining your electric gate is crucial to ensure it continues to function efficiently and safely. Regular maintenance can prevent costly repairs and extend the life of your gate.
- Regular Cleaning: Keep the gate and its components free from dirt and debris.
- Lubrication: Regularly lubricate moving parts to ensure smooth operation.
- Inspection: Check for signs of wear and tear or rust and address them promptly.
Engage With Us
Ready to install an electric gate at your property or need more information? Visit our homepage for expert advice and exemplary service. At All Gates Repair Dallas, we’re dedicated to providing you with the best gate installation and repair services in Dallas.
Conclusion
Installing an electric gate can significantly enhance your property’s security and curb appeal. By following this guide, you can ensure that your new gate not only meets your aesthetic and functional needs but also operates safely and efficiently for years to come. For any installation needs or questions, contact us; we’re here to help make your gate installation experience smooth and successful.